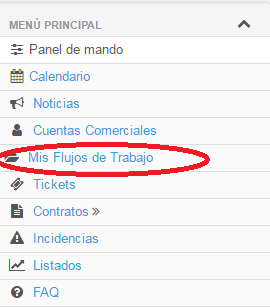
My Workflows
Description:
In the My Workflows tab, all those workflows that we have processed will appear. What is a workflow? Through the workflows we can reflect everything that happens in a process. For example: An installation, registration of a contract, etc.
 The Workflows are made up of phases, with each one being intended for a work department. To create a new workflow we will have to click on the button.
The following screen will appear:


Fields:
Category: A drop-down will appear to select the type of workflow category we are creating. To create new categories we will go to
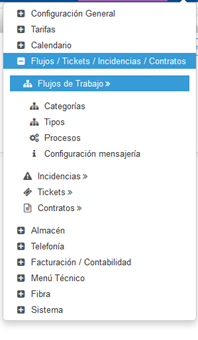 General Configuration: / Flows / Tickets / Incidents / Contracts >> Workflows >> Categories.
 The following screen will appear:

We will click on Create Flow Category
We only have to complete the name that we want to give the category and click on create.
 We will continue to create the workflow
Once the category is complete, we will select the Type of Workflow.
If the type of Workflow that we want does not appear in the list, we can create a new one for this we will position ourselves in the configuration menu on the right:
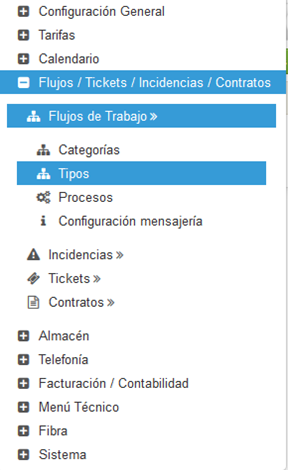


Once we click on Create Workflow Types, the following screen will appear:
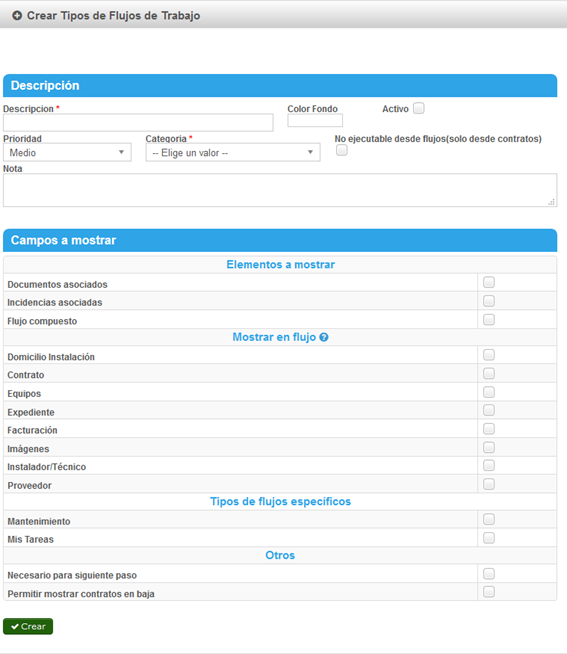
Fields:
Description: We will have to complete with the name that we want to identify the type of workflow that we are creating.
Background Color: A window will appear with a color palette to mark in which color we want the background of the workflow to appear.
Active: We will check the active box, if we want it to be so.
Priority: We can mark the priority of this workflow (medium, high ...)
Category: We will select the category to which it belongs.
Not executable from flows (only from contracts): If we check this box, this type of flow cannot be performed from My workflows, it can only be created from a contract, in the Workflows tab.
Note: We can write if we want any note that will be what appears in the flow written in the Notes section.
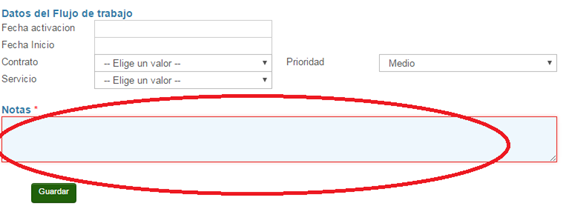
Fields to display: Refers to all the information that will appear in the aspect of the workflow.
Associated Documents: Checking this box will allow us to associate documents to the workflow.
Associated Incidents: Checking this box will allow us to associate incidents to the workflow.

Compound flow: If we mark compound flow, we will indicate to this workflow that it will be a flow that in turn contains one or more workflows.
Installation address: If we check this box, the installation address will appear in the flow.
Contract: If we check this box, the contract or active contracts that the client has will be shown.
Teams: If we check this box they will appear to select the teams associated with the client.
File: By checking this box you will have access to the contract file from the workflow.
Billing: By checking this box you will be able to access the Billing tab from the Workflow.
Images: By checking this box you can add images in the flows and in the equipment that belongs to the flow.
Installer / Technician: By checking this box, the field to fill out or select the installer / technician will appear in the workflow.
Provider: Checking this box will display the provider field within the workflow.
Maintenance: By checking this box you will have access to contract maintenance.
My Tasks: My tasks will be accessed from the workflow.
Necessary for the next step: In the case of compound flows, if we check this box it will be mandatory to finish the first part of the flow to continue with the next one.
Allow showing contracts in cancellation: In addition to active contracts (in case of having marked contract), contracts in cancellation will be shown.
 Continuing with the above we will continue creating a workflow:
Description: You will need to type in Description, the title of the workflow content.
Client: A dropdown will open with a list of clients, and we will select the client on which we are creating the workflow.
Click on create and the following screen will appear:
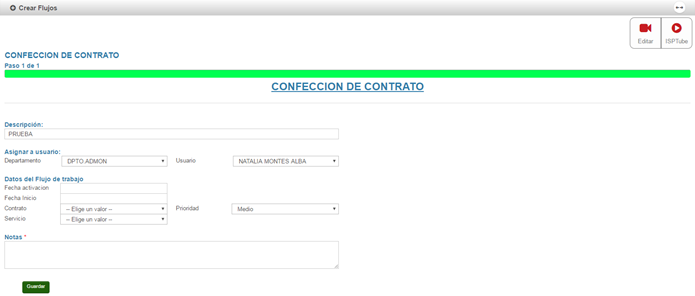
Fields:
Description: The name that we have put in Description in the previous screen is automatically completed. It may, however, be completed or modified.
Assign user:
Department: The department that this type of flow has defined will appear by default. We can select another.
User: We will select which user we are assigning the workflow to.
Client data:
Client: The client will appear by default if we have done it from your account.
Workflow data:
Activation Date: We can select the date on which the contract is activated.
Start date: Starting date
Contract: We will select which contracts we are doing the flow on.
Service: We will select which service we are doing the flow on.
Priority: We will indicate what priority the flow has.
Notes: We will write all that related to the flow.

