Skip to content

ISP-TEC App

APP for Maintenance and Technical Staff

ISP-TEC APP

This mobile application, exclusive to ISP Gestión, is designed for the technical and maintenance staff of telecommunications operators, with the aim of facilitating and speeding up their daily tasks during interventions in the field, whether on public roads or at customers' homes.

Thanks to this tool, technicians can consult work orders, register incidents, update the status of interventions and access all the necessary information in real time, directly from their smartphone or tablet.

Through this application, technicians will be able to:

  • Consult your assigned work orders (flows and tickets).
  • Record follow-ups with the progress of each service or repair.
  • Access the necessary customer information quickly and easily.
  • Create tickets and events directly from your mobile device.


The use of the application contributes to improving the efficiency of the service, reducing time, minimising errors and guaranteeing fluid communication between the technical team and the office.

SIMPLIFIES | IMPROVES | ADVANCES

home screen / login

This screen allows the technician to log into the application using his username and password defined in the ISP Management software.

If the user is linked to only one company, the session will start automatically. If, on the other hand, the user is associated with several companies, a pop-up will appear and you will have to select the company with which you wish to log in. 

After the first login, biometric authentication will be enabled, either by Face ID or fingerprint.

From the home screen, it will also be possible to access password recovery, if necessary.

FICHAJE

The first time you log in during the day, you will be directed to the next screen, where the clocking in will take place (only one clocking in per day is possible).

When accessing the clocking-in screen, a voice message will be emitted asking if you wish to initiate the clocking-in. If the answer is yes, the system will automatically record the clocking in.

NAVIGATION MENUS

The main navigation menu is located in the top left corner. From here, you can access all functions of the application:

  • My details: Information with user data.
  • Home: Main or Home screen of the application.
  • Presences: Section where work entries and exits are recorded. From here the user's current working day is recorded and consulted.
  • Event: Screen for creating and managing events.
  • Calendar: Allows the display of flows and events assigned to the user for the current day.
  • Flows: Screen to consult all assigned and pending flows.
  • Log out: Logs out of the application, but does not end the user's working day.

There is also a bottom menu and always visible, with shortcuts for the most common tasks.

HOME / MAIN SCREEN

In this screen we can see the events and flows assigned for today, as well as a map with the workplaces and a carousel showing the detailed information of each task scheduled for the current day. Selecting a work point on the map will display a pop-up containing the client's name, job description, address and assigned schedule. This carousel includes 3 buttons:
  • Phone: Make calls directly to the customer.
  • WhatsApp: Allows messages to be sent to the client.
  • Location: Shows the exact location of the job (Google Maps).

Clicking on a job in the carousel will take you to the associated flow screen.

presences

The main screen shows, by means of buttons, different situations available for a working day that can be configured from ISP Management.

From this screen, the user manages their various clocking types on a daily basis. If he/she needs to register a change of activity, just click on the corresponding button (e.g. Rest, Travel, Meeting, etc.).

The second screen shows a daily summary and details of the duration of each clocking-in period.

On the third screen, the user can register any incident during the clocking-in period.

Clicking on a sector of the pie chart will display the daily percentage of that sector.

createEvent

Events

This section is designed to allow the creation of new events from within the app.

From here, the user can enter all the information needed to register an event, including its title, the date and time it will be held, the location where it will take place and any additional details that are relevant.

Once completed, the event can be saved for recording and later displayed on the Calendar screen.

CALENDAR

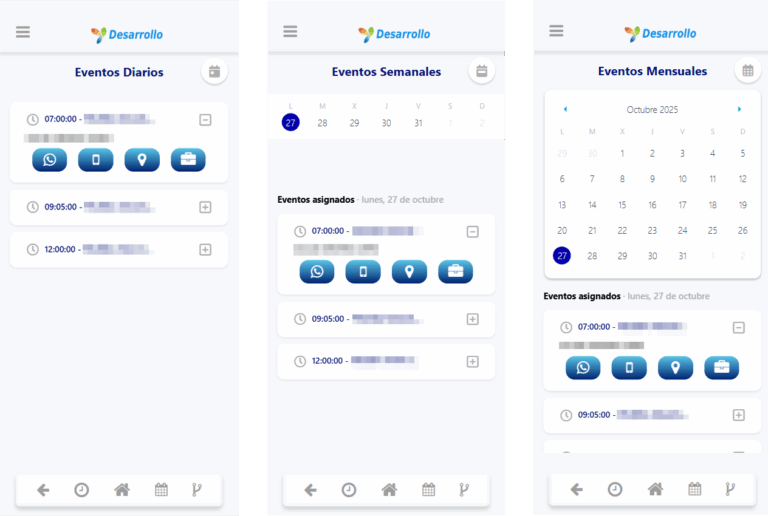
The calendar shows the events associated with the user, with daily, weekly and monthly views. By clicking on a job, the user will directly access the associated flow screen. 
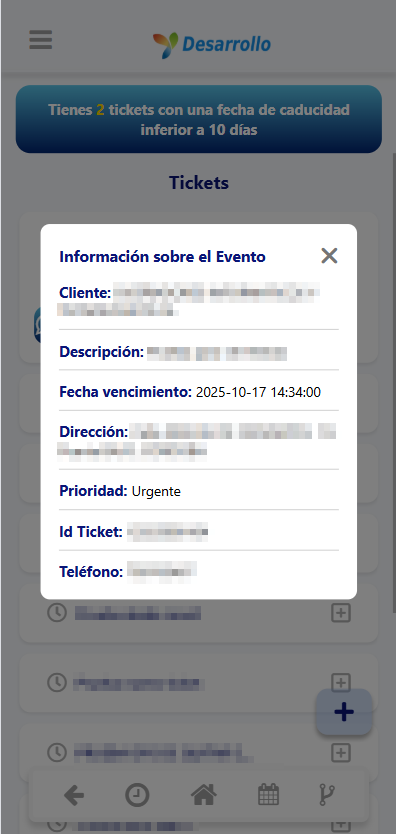
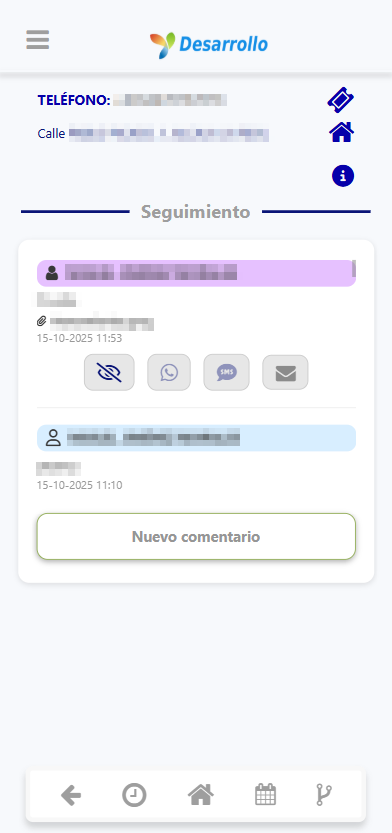
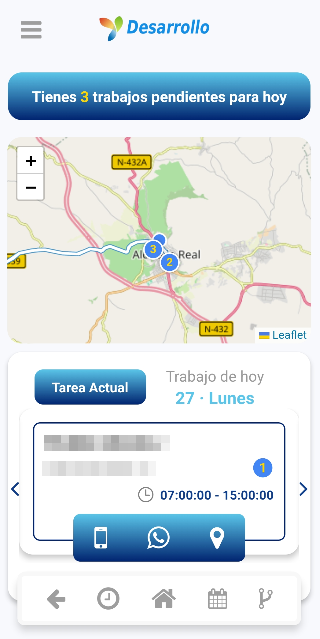
When an event is displayed, four buttons will be shown:
  • WhatsApp: Allows messages to be sent to the client.
  • Phone: Make calls directly to the customer.
  • Location: Shows the exact location of the job (Google Maps).
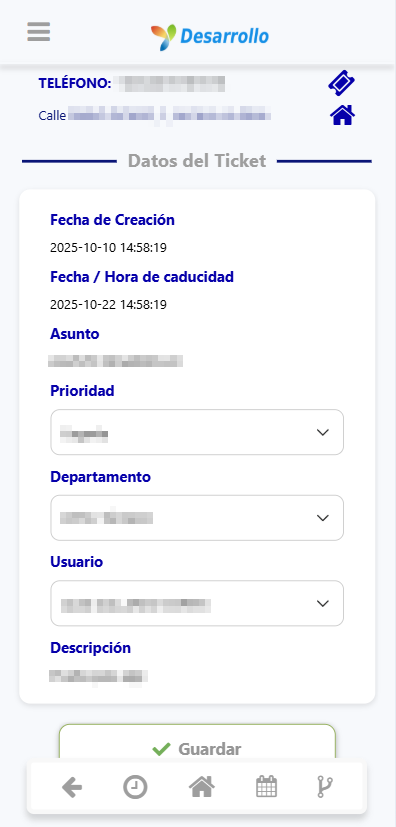
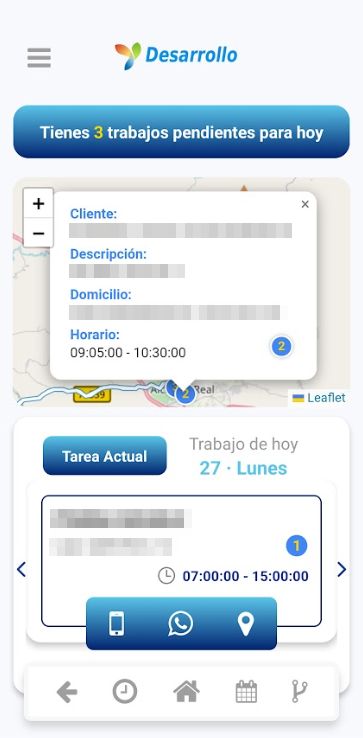
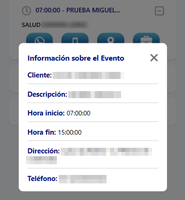
  • Briefcase: Opens a pop-up with all the job information, including description, client and schedule.

workflows

In this section, all available flows can be consulted, both those scheduled for the current day and those corresponding to other days, allowing the user to have a complete overview of their pending activities.

Each flow displays detailed information to facilitate the planning and tracking of tasks, including flow description, exact work address, time and date, as well as the flow identification number.

When selecting a specific flow, we find the action buttons. By default, two buttons will always be available: Tracking and General Data.

All other buttons will be visible only when information is available for those specific actions.

The customer's telephone number or, if it does not exist, the customer's name will be displayed at the top. The full address of the flow will also be displayed. Clicking on the house icon will open its location on the map. And clicking on the flow icon will show a pop-up with its number.

workflows - MONITORING

The tracking screen shows the requests and the history of the flow. From here it is possible to make comments, as well as to mention different colleagues.

workflows - general data

In the General Data section we find the address where the work is to be carried out and, if any, the services contracted.

workflows - online signature

From this screen, customers will be able to sign their contracts and other documents online, without having to come to our offices.

workflows - online signature

Once the document to be signed has been selected, we can set different options available for the signature, such as Certify the Document or the type of management for sending it.

workflows - teams

Here we visualise all the equipment associated with the flow.

workflows - teams

Clicking on the eye icon will open a pop-up containing a menu with various information about the equipment in question.

workflows - associated documents

This screen shows the documents associated with the flow, and we can consult, view, sign and download the documents.

workflows - archives

This screen allows you to consult the files that are part of a flow and to add new files whenever necessary.

workflows - invoicing

This screen shows the items associated with the flow, including the serial number if it has one and whether it is in stock (green) or not (red).

workflows - invoicing - articles

When you click on add article you will see the catalogue of articles. We have a search engine to filter and quickly locate the desired item.

workflows - invoicing - add item

To add an item, we select the warehouse from which we are going to withdraw it, the quantity and we choose whether we want to include it in the warehouse or not.

workflows - invoicing - add item

If the item has a serial number, the quantity is replaced by a list to choose the serial number, depending on the selected warehouse.

workflows - invoicing - modify article

By selecting an item, we can modify or remove the item from the flow. Modification only allows you to change the status of whether it is in stock or not.

workflows - invoicing - create delivery note

Finally, when you click on Create, a delivery note and the deposit of the items (if any) in ISP Gestión will be generated, and a confirmation pop-up will appear indicating that the process has been successfully completed.

associated incidents

Here we register the incidents linked to the workflow. The system allows certain actions to be executed, such as provisioning an ONT, removing equipment and other related operations.

Unavailable actions will have to be managed from ISP Management.

incidents - provisioning ont

From this section, the assignment data is displayed, and we can consult the contract and the associated service.

Once this information has been verified, we can select the desired ONT to register it.

incidences - gpon discharge

Once the system has successfully registered the equipment, the next step is to register the GPON to complete the provisioning process.

incidents - configure router

Once the GPON registration is complete, we must assign the router an identifying name, define an access password and finally register the router in the ACS server.

incidents - removal of equipment

From this screen, the user will select the ONT to execute the removal of the equipment, and a confirmation warning will be displayed before the action is carried out.

incidents - confirmation messages

For both provisioning processes and equipment recalls, a confirmation message shall be displayed when the operation has been successfully completed.

tickets

Here the user will see all his assigned tickets, sorted according to their priority, i.e. from most to least urgent.

When a ticket is displayed, we will see the customer's name and different buttons that allow us to send a message via WhatsApp, call the customer's phone number, consult the location or access detailed information about the ticket.

tickets - detailed information

The info button displays relevant data of the selected ticket.

tickets - creation

To generate a new ticket, the user will click on the (+) button located in the lower right corner of the screen. This will open the form to enter the details of the new ticket.

tickets - selection

By selecting a ticket, we will access its content, showing data of the ticket and the customer. The home icon allows us to see the exact location on the map.
The three main buttons provide access to specific information for easy management and consultation.

tickets - selection - ticket data

The Ticket Data section displays various important ticket information. The priority, department and user fields are editable. In addition, if the ticket does not yet have any follow-up, it will also be possible to modify its subject and description.

tickets - selection - customer data

The Customer Details section allows you to view relevant customer information, such as the customer's address and contracted services. These services include the location, the contract and the associated service.

ticketing - selection - follow-up

The Tracking section allows you to consult the history and evolution of the ticket. The information icon provides quick access to the Ticket Data for detailed information.

tickets - follow-up - new comment

The user will be able to write new comments, add attachments, mark the comment as visible for the customer to see and send a reply email.

en_GBEnglish (UK)
ISP Gestión
ISP Gestión
Online